


WAV2EFE METHOD
Use WAV2EFE to convert all WAVs to EFEs. This is very simple but does not provide for advanced features like setting loop points, having multiple wavesamples per layer, or having multiple layers.
AWAVE METHOD
More complicated, but provides for advanced features.
STEP 1
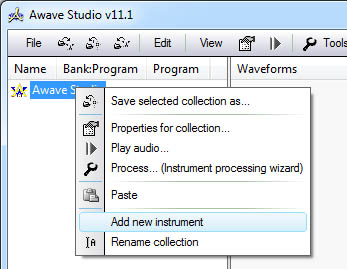
Open Awave. On start-up, there will be an item called “Awave Studio” in the left window, but using “File/Clear all” will change this to “New collection” — either way will work. In the left window, right-click on “New collection” (or “Awave Studio”) and select the “add new instrument” option.
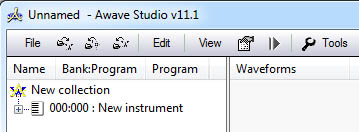
A new instrument will then be shown in the left window, as shown below.
STEP 2
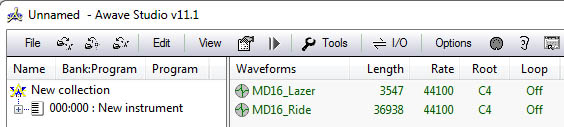
Add WAV files to the right window. Drag and drop can be used for convenience. The WAVs will be added as available wavesamples (Awave refers to these as “waveforms”), but will not yet be assigned to any layer.
STEP 3
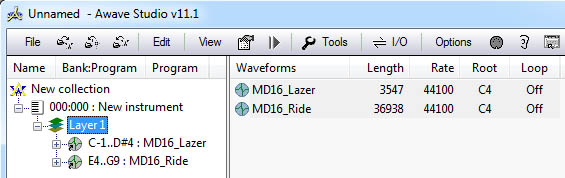
Drag any wavesamples from the right window onto the first layer in the left window to assign the wavesamples to the layer. A dialog will appear when adding more than one wavesample to the same layer — this is normal.
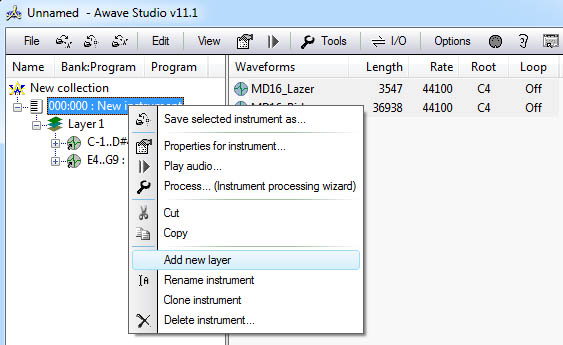
STEP 4
If another layer is desired, add a new layer by right-clicking on the instrument.
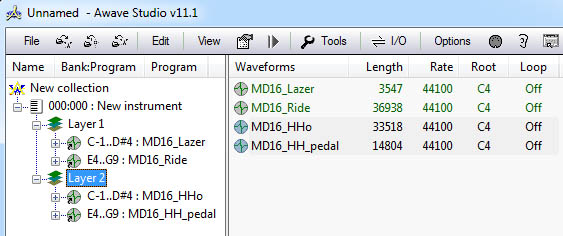
STEP 5
Repeat the drop and drop WAV process to add more wavesamples, and then add the wavesamples to layer 2 by using the same process as layer 1.
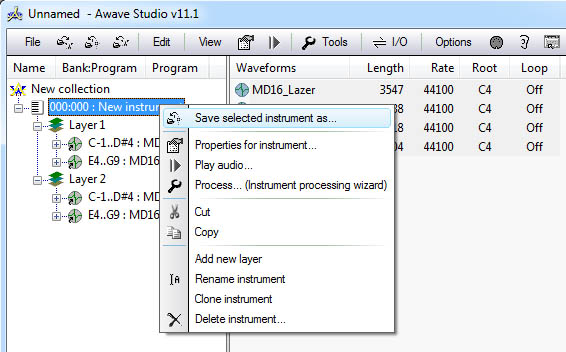
STEP 6
Make any further changes to layer properties, key ranges, root notes, loop points, etc. and then save the instrument by right-clicking on the instrument. This will include any layers and wavesamples.
STEP 7
Select Ensoniq EFE as the instrument type. Ensoniq INS is also available as an option, but there is no difference between the two formats in this context, so EFE is generally preferred.
