Users who are restricted to floppy storage on these samplers are often frustrated that there is an overwhelming amount of content available for SCSI devices (CD-ROM typically), but scarce resources for those seeking samples, instruments, banks, and effects in 3.5″ or HFE/IMG format.
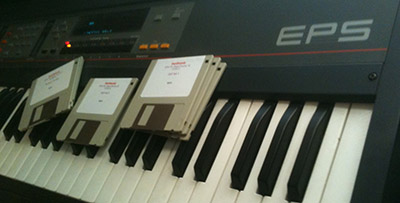
800K per disk
However, it is possible to transfer instruments and all other Ensoniq file data (EFE/EFA) from SCSI media (Zip, CD-ROM, ISO/BIN, etc.) to floppy. Two methods to do so are outlined below.
METHOD 1: ENSONIQ BANKS FROM INDIVIDUAL EFE/EFA FILES TO FLOPPY (3.5″ or HFE/HXC)
– Download EFA2IMG & EFE2IMG v0.7 (Windows and macOS)
– All supplied EFE or EFA files will be written to Omniflop type images and HFE files for use with HxC/FlashFloppy emulators.
This strategy is a very quick way to produce lots of floppy images, but relies upon individual EFE/EFA files which have already been extracted from CD or copied from elsewhere. As such, it is worth combining this method with the bank extraction technique explained in the following section. EFE/EFA files can be extracted from CD ISOs or other media using EnsoniqFS, and then many disks can be rapidly created using EFA2IMG & EFE2IMG.
METHOD 2: ENSONIQ BANKS FROM CD/ZIP/HDD TO FLOPPY (3.5″ or HFE/HXC)
– Download Total Commander and EnsoniqFS.
Note: While Total Commander does also come in a 64-bit variety, EnsoniqFS requires the 32-bit version. No worries, this will still work on 64-bit systems. EnsoniqFS is known not to work under Windows 98, so use XP or higher.
– Install and run Total Commander (32-bit)
– Install EnsoniqFS via the Total Commander interface
– In the left side navigator of Total Commander, select “Network Neighborhood” from the small dropdown menu
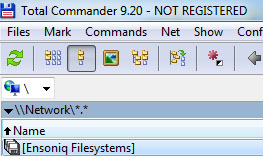
via Network Neighborhood dropdown
– Double-click “Ensoniq Filesystems” in the newly listed Network Neighborhood entries
– Double-click “Options” and make sure all checkboxes are configured as the screenshot below (defaults):
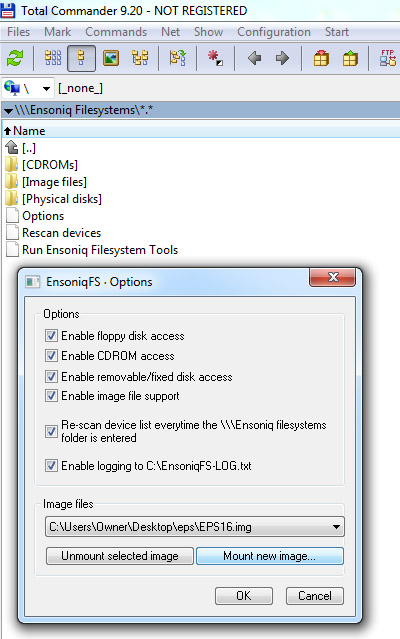
Options configuration
– Mount at least one floppy image and any other images (CD-ROM ISOs, etc.) to be used
Note: For convenience, blank images have been made available directly below.
Ensoniq ASR Blank Floppy Image (IMG & HFE)
Ensoniq EPS/EPS16 Blank Floppy Image (IMG & HFE)
Note: At minimum, one floppy image must be mounted. However, CDs can be accessed via PC CD-ROM or ZIP disk, as well as SCSI devices on computers possessing SCSI interface cards.
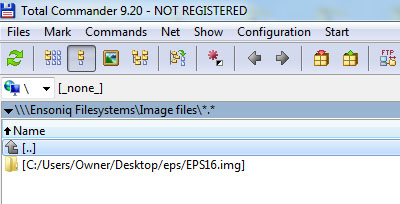
Browse to a folder containing EPS images
– From the Network Neighborhood / Ensoniq Filesystem browser, double-click “Image files” and then double-click the desired mounted floppy image
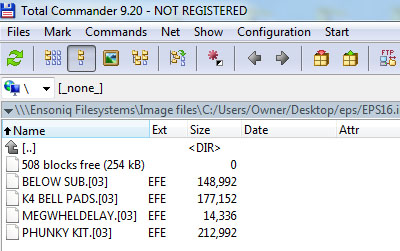
Listing of floppy contents
Any Ensoniq files present on the disk image will now be displayed, along with the file type (EFE/EFA) and size.
Note: Ensoniq floppies are limited in capacity. Some banks from other media will simply be too large to fit on a floppy. This is a hard limitation.
Space can be freed on non-empty floppy disk images by selecting an unwanted file (EFE, etc.) and using the ‘F8’ key to delete. EPS/EPS16 disks can only hold 800K of data, whereas ASR disks typically hold 1.6MB.
– Using the browser on the right, enter Network Neighborhood / Ensoniq Filesystems and then browse to any Ensoniq volume. Again, this can be a mounted ISO, a physical SCSI drive, or an actual Ensoniq CD in the CD-ROM drive
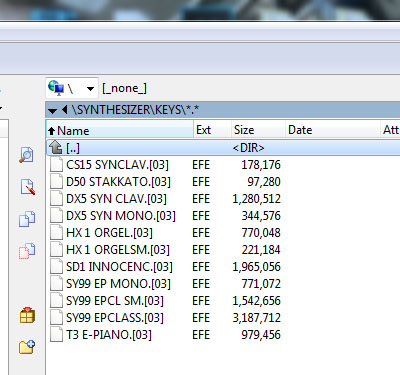
Network Neighborhood via right-side browser
– Drag and drop a suitably sized file from the right-side browser (CD/HDD/ZIP volume) into the left-side browser (floppy image)
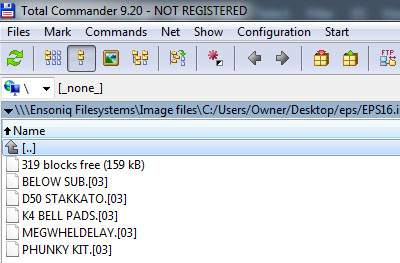
New file happily copied!
At this point, paths diverge whether the target is a physical 3.5″ DD/HD floppy disk, or if a floppy emulator is installed in the EPS/ASR.
Traditional floppy users can now use Omniflop to write the new IMG file to a real floppy. HxC/FlashFloppy users can either copy the IMG file to their drive (if their emulator has been configured to support raw images), or the IMG file can be converted to an HFE file using HxC Software.
Physical 3.5″ Floppy Method
Note: This method requires a PC with an internal 3.5″ floppy drive installed. USB-type floppy drives will NOT work for EPS/ASR disk creation!
– Install Omniflop and its required drivers
– Run Omniflop and choose to write a disk
– Select the newly created floppy image and write it as an EPS 3.5 DD 800K or an ASR HD 1.6MB type image (as appropriate)
Note: Advanced users can actually write directly to floppy via Total Commander and EnsoniqFS so long as the Omniflop drivers are properly installed and Total Commander is configured correctly. The EnsoniqFS instructions covers this approach.
HxC Software (IMG to HFE) Method
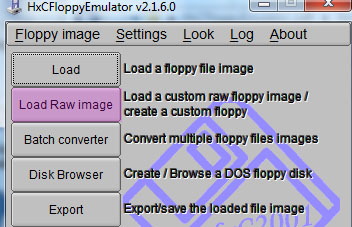
Select ‘Load Raw image’
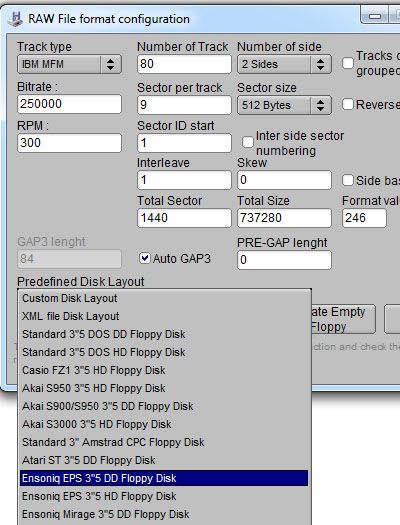
Choose the corresponding EPS/ASR disk layout
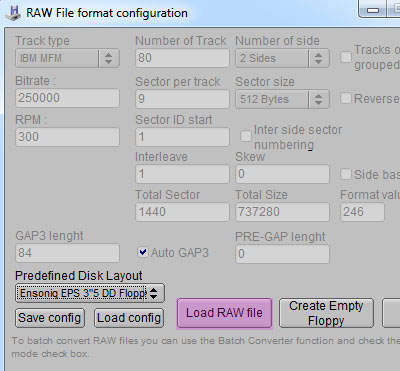
Load the new EPS/ASR file image
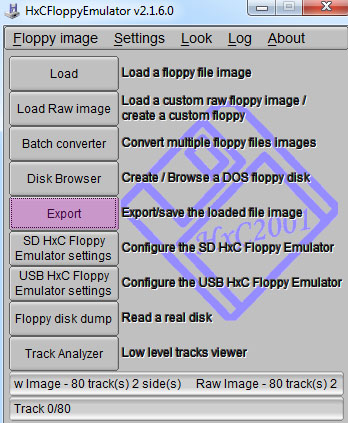
Export as HFE
Note: Unlike the EPS series, the ASR series can use two different disk types/sizes. Before saving an ASR HFE, set the HFE interface type to either IBM PC DD or IBM PC HD depending on the disk image size. For the purposes of this article, this will almost always be IBM PC HD. EPS HFEs will correctly default to the Generic Shugart interface mode.
TROUBLESHOOTING
Problem: EnsoniqFS shows no drives under “Physical disks”.
Solution: EnsoniqFS needs elevated privileges, so set Total Commander to run as administrator.
Problem: EnsoniqFS won’t install or can’t be launched in Total Commander
During attempted installation of EnsoniqFS, Total Commander may specifically state that plugins are missing from the system, or Total Commander may report that it cannot load the EnsoniqFS.wfx plugin when “Network Neighborhood\Ensoniq Filesystems” is explored after installation (even if it was working previously).
Potential solution 1:
EnsoniqFS cannot be used with Total Commander x64. If in doubt, download the following archive which contains versions of EnsoniqFS and Total Commander which have been tested to be compatible. It also contains a blank EPS disk image.
EnsoniqFS-Total Commander EPS/EPS16 Starter Pack
Potential solution 2:
EnsoniqFS requires COMDLG32.DLL, KERNEL32.dll, msvcrt.dll, and USER32.dll on the host computer.
Most notably, msvcrt.dll is a part of Microsoft Visual C++, and may need (re)installation. Try installing the Microsoft Visual C++ Redistributable for Visual Studio 2017 or other Visual C++ packages and then reboot.
Potential solution 3:
EnsoniqFS does not like anything prior to XP (Windows 95/98/ME), so use XP or later.


