


DISCLAIMER: EVEN WHEN CONDUCTED PROPERLY, THESE INSTRUCTIONS MAY POSE A RISK LEGALLY, OR PHYSICALLY TO YOURSELF AND / OR YOUR PROPERTY. YOU ACCEPT ALL RESPONSIBILITY BY PROCEEDING.
This is a tutorial on how to replace a cracked screen (glass / digitizer / touchscreen) on an R830. This repair is only applicable to cracked glass, and not for a damaged LCD panel. If you have a picture, but can’t use your phone because of the broken glass, then this repair is appropriate.
Read these instructions fully before attempting them!
Tools needed:
Precision phillips-head screwdriver
Thin plastic guitar pick (or another plastic device that is quite firm and very thin / tapered)
Gloves (to protect your hands from broken glass)
Packing tape (optional, but recommended)
Microfiber cleaning cloth (optional, but recommended)
Tweezers (optional, but recommended)
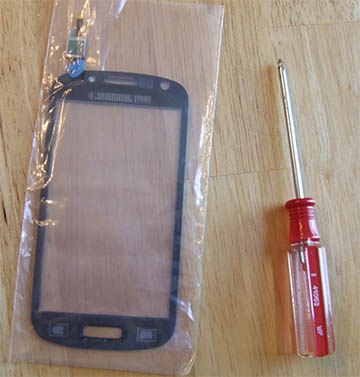
Digitizer Glass and Screwdriver
Step 1: Purchase a glass / digitizer replacement. These can be had for about $20. Make sure to get one that matches the color of your phone (if aesthetics concern you).
Step 2: Remove the back cover from the phone.
Step 3: Remove the battery.
Step 4: Remove all the screws from the back. Place these somewhere safe. They are tiny and easily dropped / lost.
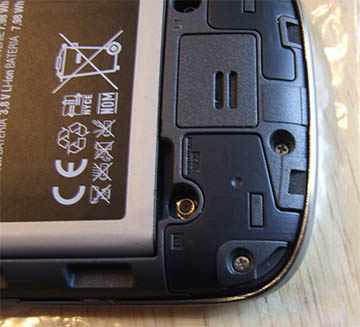
Multiple Screws
Step 5: You will now need to use a guitar pick to pry apart the back housing from the front housing. Pry in from the side, and work your way around. This can be a bit tricky at first, but just keep wiggling. You’ll get it.
Important Note! — Once you have popped the majority of the tabs that hold the two halves together, do NOT get overzealous and pull the two halves apart forcefully! The two halves are connected by a ribbon cable that will be carefully removed in the next step.
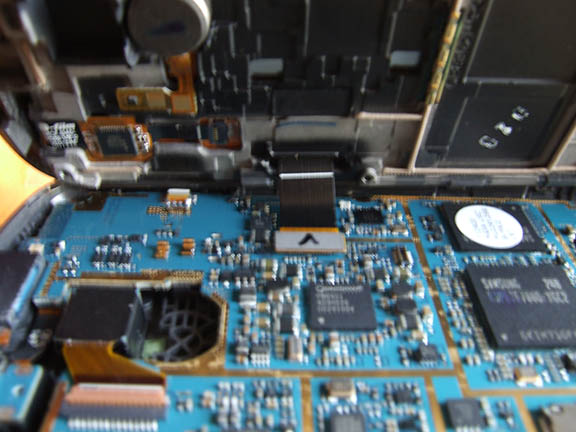
Ribbon Connecting Both Halves
The halves also tend to get stuck near the top left corner. There is a little metal clip in that corner that you may need to carefully pop or wiggle.
Top Left Corner (if holding phone to use it)
Step 6: Now that you can separate the two halves enough to work on the inside, you will see the ribbon cable that connects the 2 main circuit boards together. This simply lifts straight-up vertically. It does not slide out, or clip in. It’s simply a press-on / pull-off connector. Carefully unhook it.
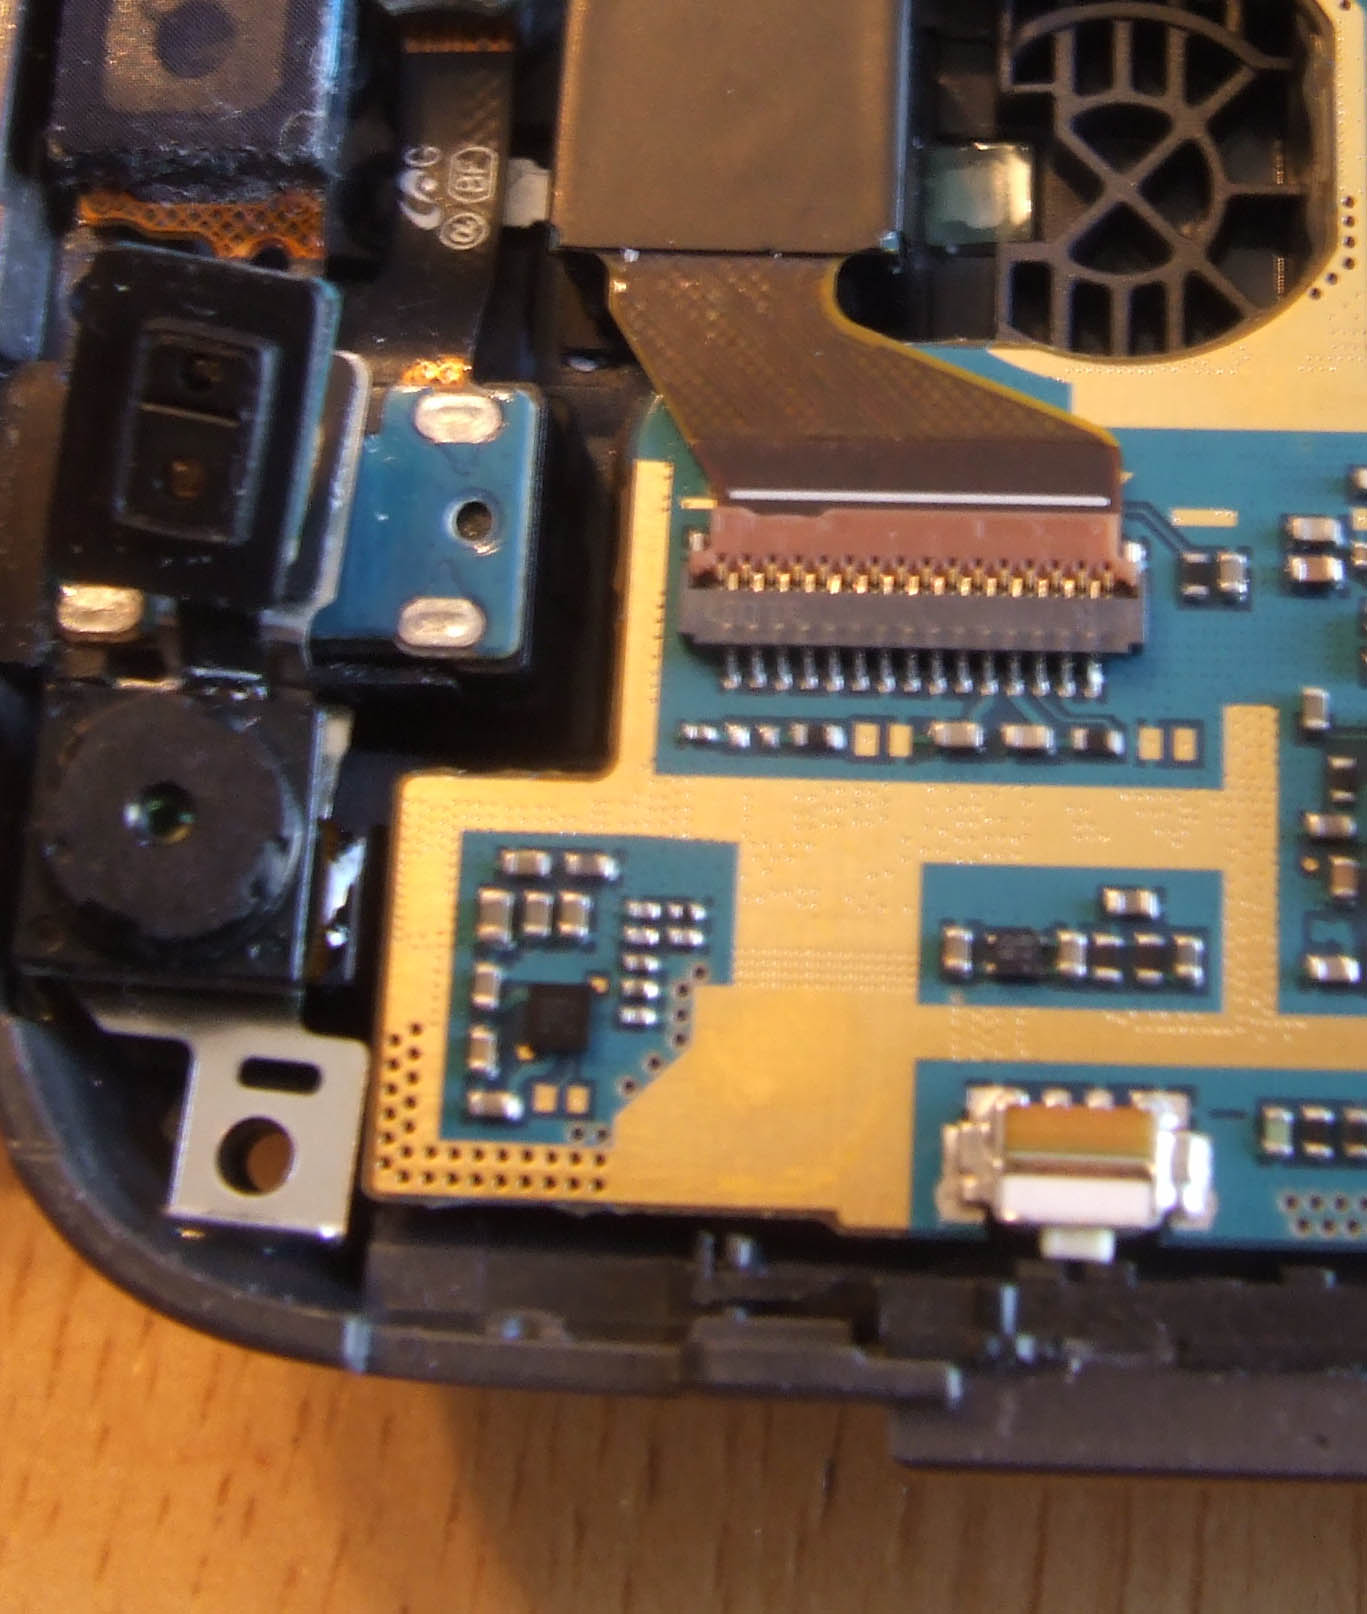
Step 7: The back half (where you’d put the battery in) can be set aside for now. Take the front half (with the screen) and look at the backside, and towards the top. You will see a ribbon cable that has a small circuit board on it. Disconnect that. There is no release, it simple slides out. You might need needle-nose pliers, or tweezers to get at it.
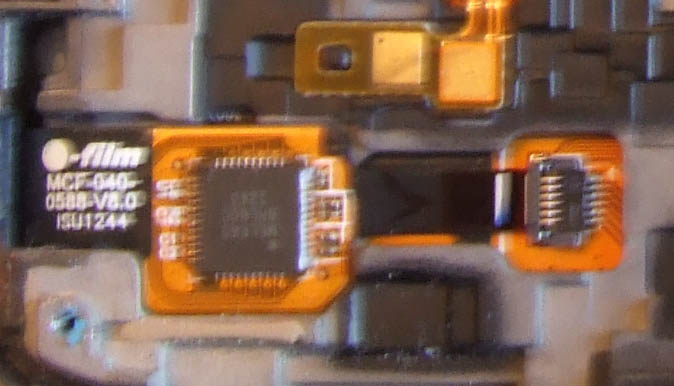
Digitizer Ribbon Cable
Step 8: Now comes the tricky part. We need to pry the glass away from the front half of the case. This is mounted with adhesive, which is where the thin plastic guitar pick comes into play. But first we should put a strip or two of packing tape on the front of the glass which will help us remove it as one piece, and keep it from shattering even more. It’s already broken, but no need to make an extra mess of things.
Step 9: Wearing gloves (it’s broken glass!), work your guitar pick between the frame and under the glass wherever you can get it. This is tricky, and this is why you need a thin pick, but also a firm pick. Once you get the tip of the pick under one section, you can simply work your way around the entire glass. The glass is only adhesive around the sides. It is not adhesive where it covers the LCD screen, so you do not need to push the pick in very far. You will need to get around the “Home” button on the bottom, as well as the speaker at the top, though. Watch out for small glass bits and shards.

Be Firm, But Careful!
Important Note! — The LCD panel is directly under the glass, so do not get overzealous with the guitar pick. Try to use just the tip (especially at the sides of the glass), and do not angle it sharply down. You do not want to scratch or otherwise damage the LCD! Try to keep the pick as parallel to the LCD as possible, and use smooth and gentle motions. Try not to smear the adhesive onto the LCD by using left-right motions when separating the glass from the side of the frame. Try to avoid any debris (tiny glass bits) from being rubbed into the LCD screen.
Towards the top of the screen, you will most likely end up (accidentally) cutting through the ribbon cable that connects the glass / digitizer to the main circuit board. This should be okay, as the replacement glass has this ribbon cable built into it.

Both Ribbons (Digitizer Ribbon is Cut Through!)
Step 10: Once the glass has been separated from the frame, remove the glass. The packing tape strip should be holding the majority of the glass together, making this step fairly simple. Remove the (remaining) digitizer ribbon cable from the main board if you haven’t already.
Important Note! — The “Home” button is held into place by the glass, so make sure not to lose it when you remove the screen.

Don’t Lose That Home Button!
Step 11: Using a microfiber (or very soft) cloth, clean any dust / debris / fingerprints from the LCD screen. Do NOT rub vigorously, or grind glass bits into it. Be gentle. Carefully try to remove or minimize any adhesive that has been smeared onto the LCD screen. Take care not to get any debris into the sections by the “Home” button or at the top where the adhesive residue remains.
Step 12: Take the replacement screen (don’t get any fingerprints on it!) and remove the adhesive backing strip. Run the ribbon cable through the front frame, so it’s in an appropriate place to be reconnected to the main board. Place the “Home” button back where it belongs and make sure it will line up with the glass properly. Do NOT forget to replace the “Home” button under the glass! Do NOT forget to slide the ribbon cable through the slot!
Slide Digitizer Ribbon Through Top Right Slot
Once you are fully sure that the ribbon cable is through the hole, the “Home” button has been replaced, and there is no debris or fingerprints, press the screen into the frame. It’s adhesive, so you’ve only got one chance at this. Line it up properly before committing.
Step 13: Flipping the front half over (circuit board side) peel off the adhesive backing on the ribbon cable chip, and stick it down. Using tweezers, slide the ribbon cable back into its slot.
Step 14: Now we need to connect the front half and back half again. Take the ribbon cable from the front half, and snap it back into its connector on the back half of the phone. This is just a pressure fit connection, so align it properly and press straight down.
Step 15: Making sure all the components are aligned properly (especially the little metal clip in the top corner!), press the two halves back together. They should simply snap back into place. Push around the whole edge of the frame to make sure everything is aligned and snug.
Step 16: Replace all the small screws.
Step 17: Replace the battery.
Step 18: Replace the back cover.
Step 19: If there was a protective film that came on the replacement glass, feel free to remove it. Cross your fingers and hold down the power button. If you did everything correctly then your phone should now be visible (no more cracked glass!) and touch-sensitive once again.
If this worked, congratulations. Now go by yourself a screen protector and a case.