


Answer: So many that most people are under the impression they were manufactured without one.
The traditional method for getting a functional backlight on an RZ-1 is to replace the EL (electroluminescent) foil with a fresh one.
A fresh electroluminescent backlight.
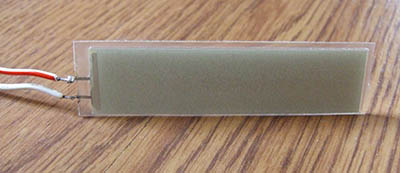
Take care not to reverse these.
If it is desired or necessary to keep the RZ-1 fully stock then this is the only option. It’s also the easiest electrically as it only requires soldering two wires.
Unstick this tab and push to the right.
Probably the easiest approach to replacing the EL foil is to buy one sized for an E-mu Emax which, as it just so happens, shares the same dimensions with the RZ-1 foil. Then it’s simply a matter of opening the case, removing the old EL foil, unsoldering the anode and cathode leads, soldering the leads to the new EL foil, and then sliding the new EL foil back under the LCD display.
EL foil of the proper size can frequently be found on eBay for $20 by the seller “backlights”.
It’s about as simple as replacing a backlight can possibly get, but it’s also unsatisfactory for a number of reasons:
1) EL foil fades with use. This is unavoidable; it’s simply the nature of the beast. In fact, EL foil fades so quickly that it often has to be replaced numerous times within the lifespan of the display.
2) EL foil is relatively dim. Even a fresh backlight doesn’t put out enough illumination to be significantly visible in anything but a dim or dark room.
3) EL foil depends upon a high voltage inverter to be present in the power supply. This not only presents a (moderate) shock hazard, but also can result in a high pitched whine which can be audible both in the audio output and acoustically.
4) The viewing angle and contrast of these old LCD/EL foil displays is adequate but poor when compared to newer technology.
So what’s the alternative?
Typically, modern LCD character displays with LED backlights are the preferred replacement for ancient displays of this style. Replacing the entire display is not only better because it solves all the problems listed above, but these new style displays are only a quarter of the cost of even the cheapest EL foil without a replacement display. They’re also pin compatible and run off the very same voltages present in the equipment already. A lot of the times they’re even available in the same physical dimensions and are a 1:1 drop-in replacement–no mods required.
Incredible! How come everyone isn’t rocking one of these amazing new LCD/LED combo displays in their Casio RZ-1 then?
Because the RZ-1 is fairly odd in that it is a true 16×1 display. Back in the ’80s when these kind of displays were still new technology, 16×1 displays were expensive because they required two separate chips. The cheaper “hack” for this was to use a single display chip with 8×2 support and then physically move the second display line to the right of the first line instead of below it (as it was technically designed to be).
This hack required a bit of extra coding for it to work, but the cost saved was deemed worth it. The problem is that this hack was/is so routinely used that the only modern 16×1 displays available are in this 8×2/faux-16×1 configuration–they simply aren’t available with true 16×1 addressing. That’s fine for almost all other gear (including the Casio CZ series) but we’re out of luck with the RZ-1.
The only way a modern 16×1 display could be dropped into the RZ-1 would be to rewrite the firmware and adjust the display addressing to use the 8×2 hack instead of true 16×1 addressing.
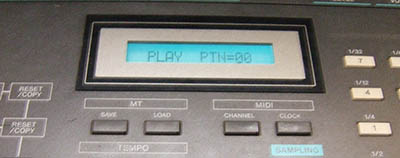
So there’s no hope and everyone is stuck with old and noisy EL foil lit displays from 1986?
Unless someone is willing to get creative and think outside of the box, yes.
Wait for it… wait for it… drum roll, please!
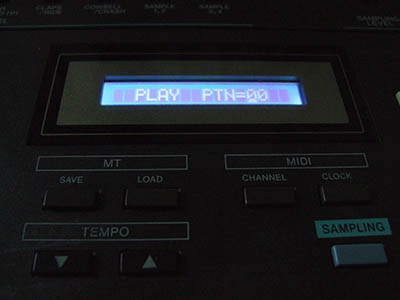
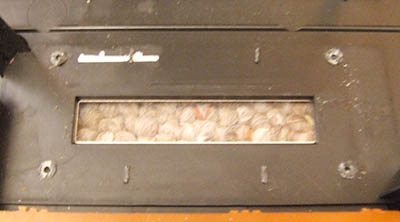
My future’s so bright, I’ve gotta wear shades.
No, this isn’t trickery. This is an actual LED backlit LCD display in a real Casio RZ-1. The picture doesn’t come close to doing it justice; it looks tremendously better in real life. But even in the picture it can be seen to be both higher contrast and significantly brighter than the EL foil–and for under $5.00 including shipping.
The solution is so obvious that it should be common knowledge among vintage audio gear junkies by now, but here’s a hint: LCD/LED character displays that support the Hitachi HD44780 standard and have the additional HD44100H driver chip necessary for true 16×1 addressing are extremely common and widely available for about $5 any day of the week.
Here’s the kicker:
- They aren’t 16×1.
Come again?
Yes, folks. The common and ever-so-humble 16×2 character display is all that’s needed to jettison that atrocious EL foil and kick the old display back to 1986. It also opens up the possibility of ripping out that noisy inverter from the power supply as an added benefit.
The drawback is that the RZ-1 case needs to be modified to accommodate. Fortunately, the modifications are all internal and don’t affect the cosmetics or operation of the RZ-1 on any level.
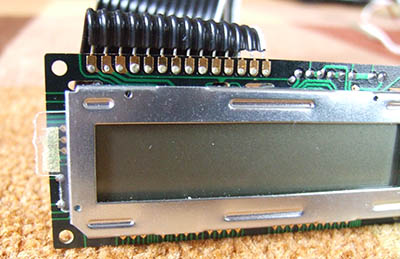
Although the display appears to be a perfect fit (the screw holes line up and everything!) the problem is that the top character line needs to be brought down to slightly above center in the viewing window. Doing so requires cutting out all four of the mounting posts that the display sits on, as well as the little alignment “fins” present in the same area. It’s a very small sacrifice for such large gains, though.
The point of no return.
Wire cutters (aka diagonal pliers) work well for this. They cut flush to the surface and can easily remove the plastic posts without damaging anything else. But once the posts are gone, how can the display be mounted?
Many methods could be employed here, but here’s an easy and cost-effective one:
Get six traditional popsicle/craft sticks or similar wood. The idea is to get thin and straight bits of wood which can be stacked until they are approximately equal in height to the plastic display mounting posts.
Make two stacks, each three sticks high. Glue and clamp each set together and let them fully dry. Next, cut both ends off one of the stacks, leaving a 9cm long bar in the middle. Do the same with the other stack except make it 4cm long.
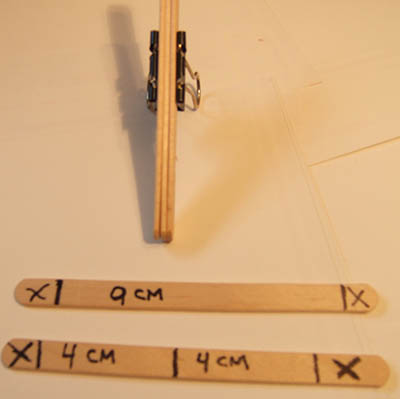
5 sticks are all that’s needed if done conservatively.
The 9cm bar should be centered horizontally across the bottom of the display and the 4cm bar goes vertically up the side, forming an L shape. Three corners of the display should have screw holes over the wood, and one corner should be floating free. Use a thin Sharpie or pen to mark each screw hole alignment on the wood under all three corners. With a 1/16″ bit, drill a hole slightly smaller than the mounting screws (recycled from the old display) at each mark. The 9cm bar should have two mounting holes, the 4cm bar should have only one. Mount the display on the two bars using three screws.
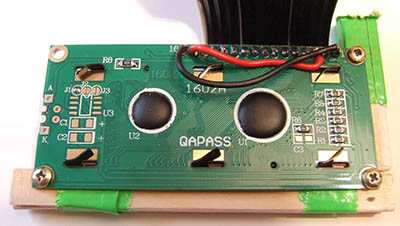
Only prototypes need duct tape 😉
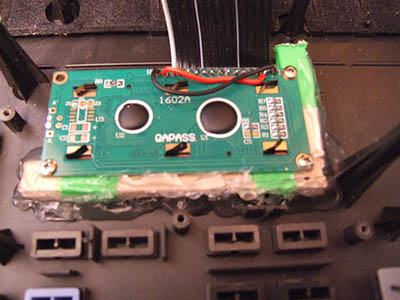
Use the display window and former screw post locations to guide the horizontal placement of the display. Next, look through the display window and adjust the vertical placement until the upper portion of the black plastic display bezel is barely visible at the top of the window and then slide it back up ever-so-slightly until it’s just out of sight again. Having an assistant to check the alignment or adjust/maintain the display position is a technique worth exploring.
Once so positioned, tack each overhanging portion of the bars (three corners) down with hot glue. Connect and power on the display to double-check its alignment.
Remember: The typical viewing angle when using the RZ-1 means the display should be vertically off-center and closer to the top of the window.
If the display is level, horizontally centered, and appears vertically centered when viewed from the position of normal use then coat the outer perimeter and overhang of the wooden display bars liberally with hot glue or some other more durable fixative. Removing the button circuit board will give a lot more room to work on this step, but isn’t strictly necessary.
Don’t get any glue on the button posts.
Before reassembling the case, consider removing the power supply board to desolder the small transformer or otherwise disable the backlight inverter. Removing the white/red backlight wire harness from the power supply board can cut down on the emitted noise, but only eliminating the inverter will cure the whine entirely.
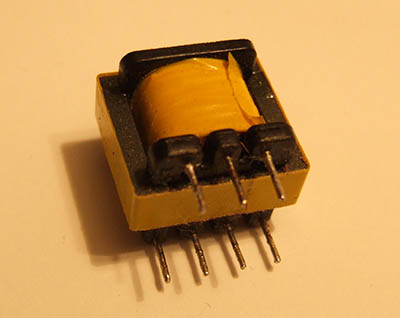
The RZ-1 backlight inverter transformer. Yank it out.
Tech notes: The anode of the LED backlight doesn’t need to pull power from anywhere special. Jumping Pin 2 (VDD, +5V) to Pin 15 (anode) works quite well. Likewise, jumping Pin 1 (VSS/ground) to Pin 16 (cathode) is convenient and effective.
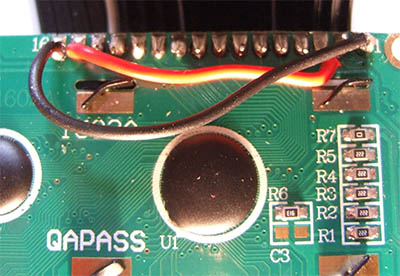
Easiest wiring job possible.
The display pinout is exactly the same as the stock display. The white stripe of the display cable should go to Pin 14.
The contrast of the display likely will not require adjustment, but a 10K variable resistor on Pin 3 will do the job, if desired.
A compatible display can be purchased from multiple vendors on eBay.
OLED Displays
In theory, 16×1 OLEDs have the proper addressing to be a direct drop-in replacement for the RZ-1, but in practice most (or all) 16×1 OLEDs use a WS0010/RS0010 or equivalent chipset which tends to be less lenient than the Hitachi HD44780 used by the stock display. As such, custom firmware is still a requirement.
An RZ1 firmware update (v2.00) has been developed to add support for these modern displays as well as many other features.

Inky Black
Supported OLEDs
Vishay 016N001ABPP5N0000 (blue) or O016N001AWPP5N0000 (white) via Mouser, U.S. distributor
Raystar REC001601ABPP5N00000 (blue) or REC001601AWPP5N00000 (white) via TME, European distributor
Winstar WEH001601ABPP5N00000 (blue) or WEH001601AWPP5N00000 (white) via Comet, Bulgarian distributor